Synth plugins have revolutionized music production, offering limitless sonic possibilities for producers of all genres. Whether you’re an aspiring beatmaker, a seasoned film composer, or a bedroom producer, learning to move beyond presets and develop your own unique sound is a crucial step in your creative journey. This comprehensive guide will walk you through the process—from understanding the basics of synth plugins to mastering advanced sound design techniques—so you can confidently craft your signature sound.
Presets are a fantastic way to explore the capabilities of a synth plugin, but relying solely on them can limit your creative expression. Personalizing your sounds allows you to stand out in a crowded music landscape, develop a recognizable style, and truly connect with your audience. As you learn to sculpt your own patches, you’ll gain a deeper understanding of synthesis and unlock new creative possibilities12.
Understanding Synth Plugins: VST, AU, and AAX Explained
Synth plugins are software instruments that emulate analog or digital synthesizers. They come in several formats, with VST (Virtual Studio Technology), AU (Audio Units), and AAX (Avid Audio eXtension) being the most common1.
| Format | Platform | DAW Compatibility | Notes |
|---|---|---|---|
| VST | Windows, Mac | Ableton, FL Studio, Cubase, more | Most widely used |
| AU | Mac | Logic Pro, GarageBand | Exclusive to Apple |
| AAX | Windows, Mac | Pro Tools | For professional studios |
Understanding which format works best for your DAW ensures a smooth workflow and access to the best plugins for your needs1.
The Power of Presets: Starting Points, Not Endpoints
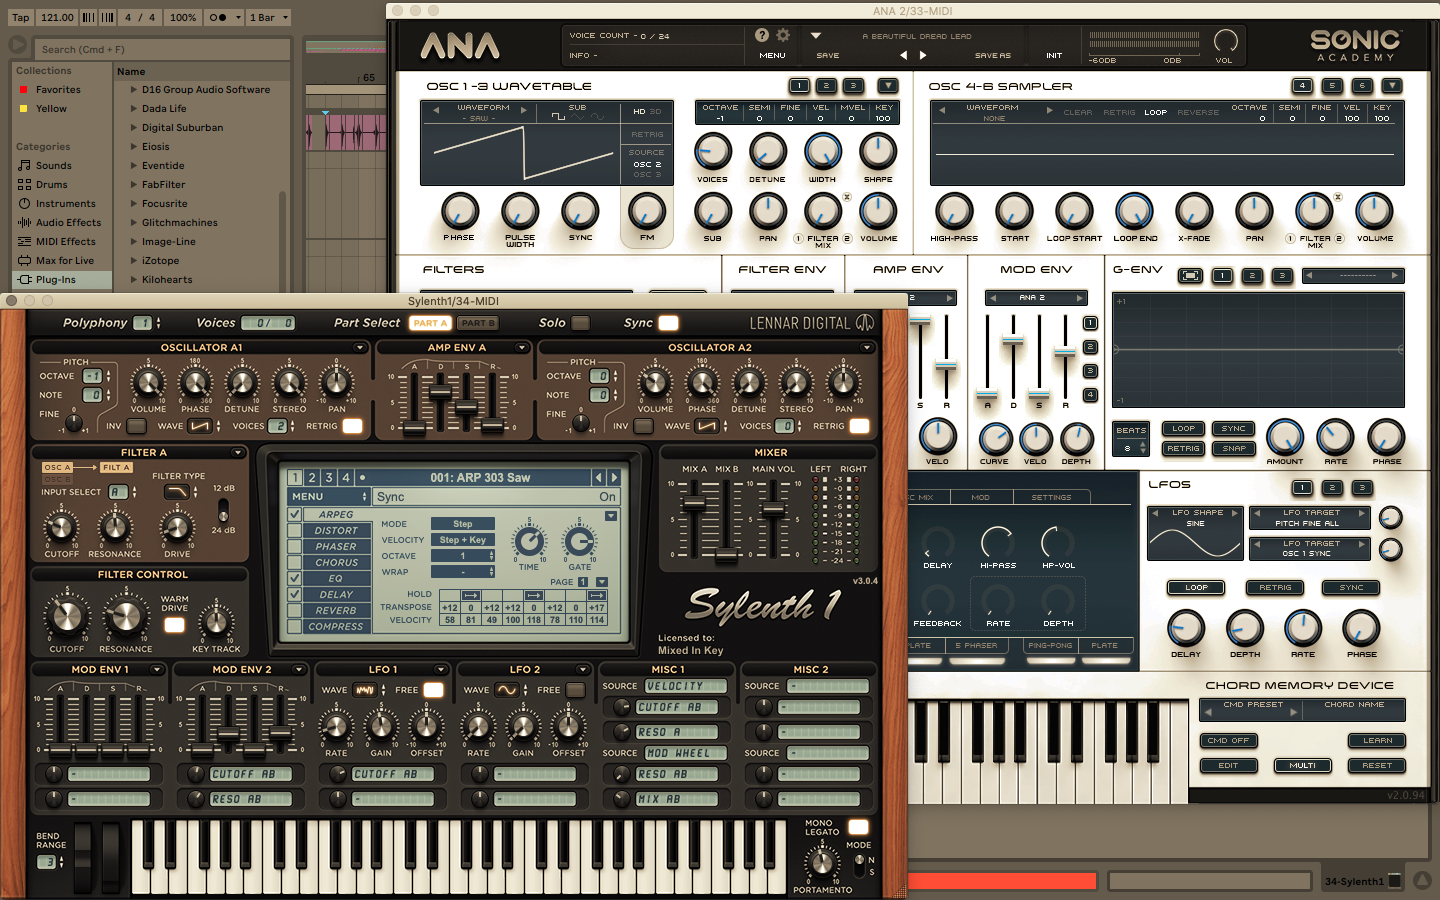
Presets are invaluable for learning how a synth works. By analyzing preset settings, you can reverse-engineer sounds and understand how different parameters interact. However, to develop a signature sound, you should view presets as starting points. Tweak oscillators, filters, envelopes, and effects to infuse your personality into each patch1.
Essential Synth Plugin Types and Recommendations
Synth plugins come in various types, each with unique characteristics:
- Subtractive Synths: Classic analog-style synthesis (e.g., Serum, TAL-Noisemaker)
- FM Synths: Complex, metallic timbres (e.g., Dexed, Native Instruments FM8)
- Wavetable Synths: Morphing waveforms for evolving sounds (e.g., Serum, Vital)
- Granular Synths: Manipulate audio grains for unique textures (e.g., Output Portal)
- Physical Modeling Synths: Emulate real-world instruments (e.g., Arturia Pigments)
For beginners, free plugins like Surge XT, Tyrell N6, and Vital offer professional-quality sounds and deep customization options1.
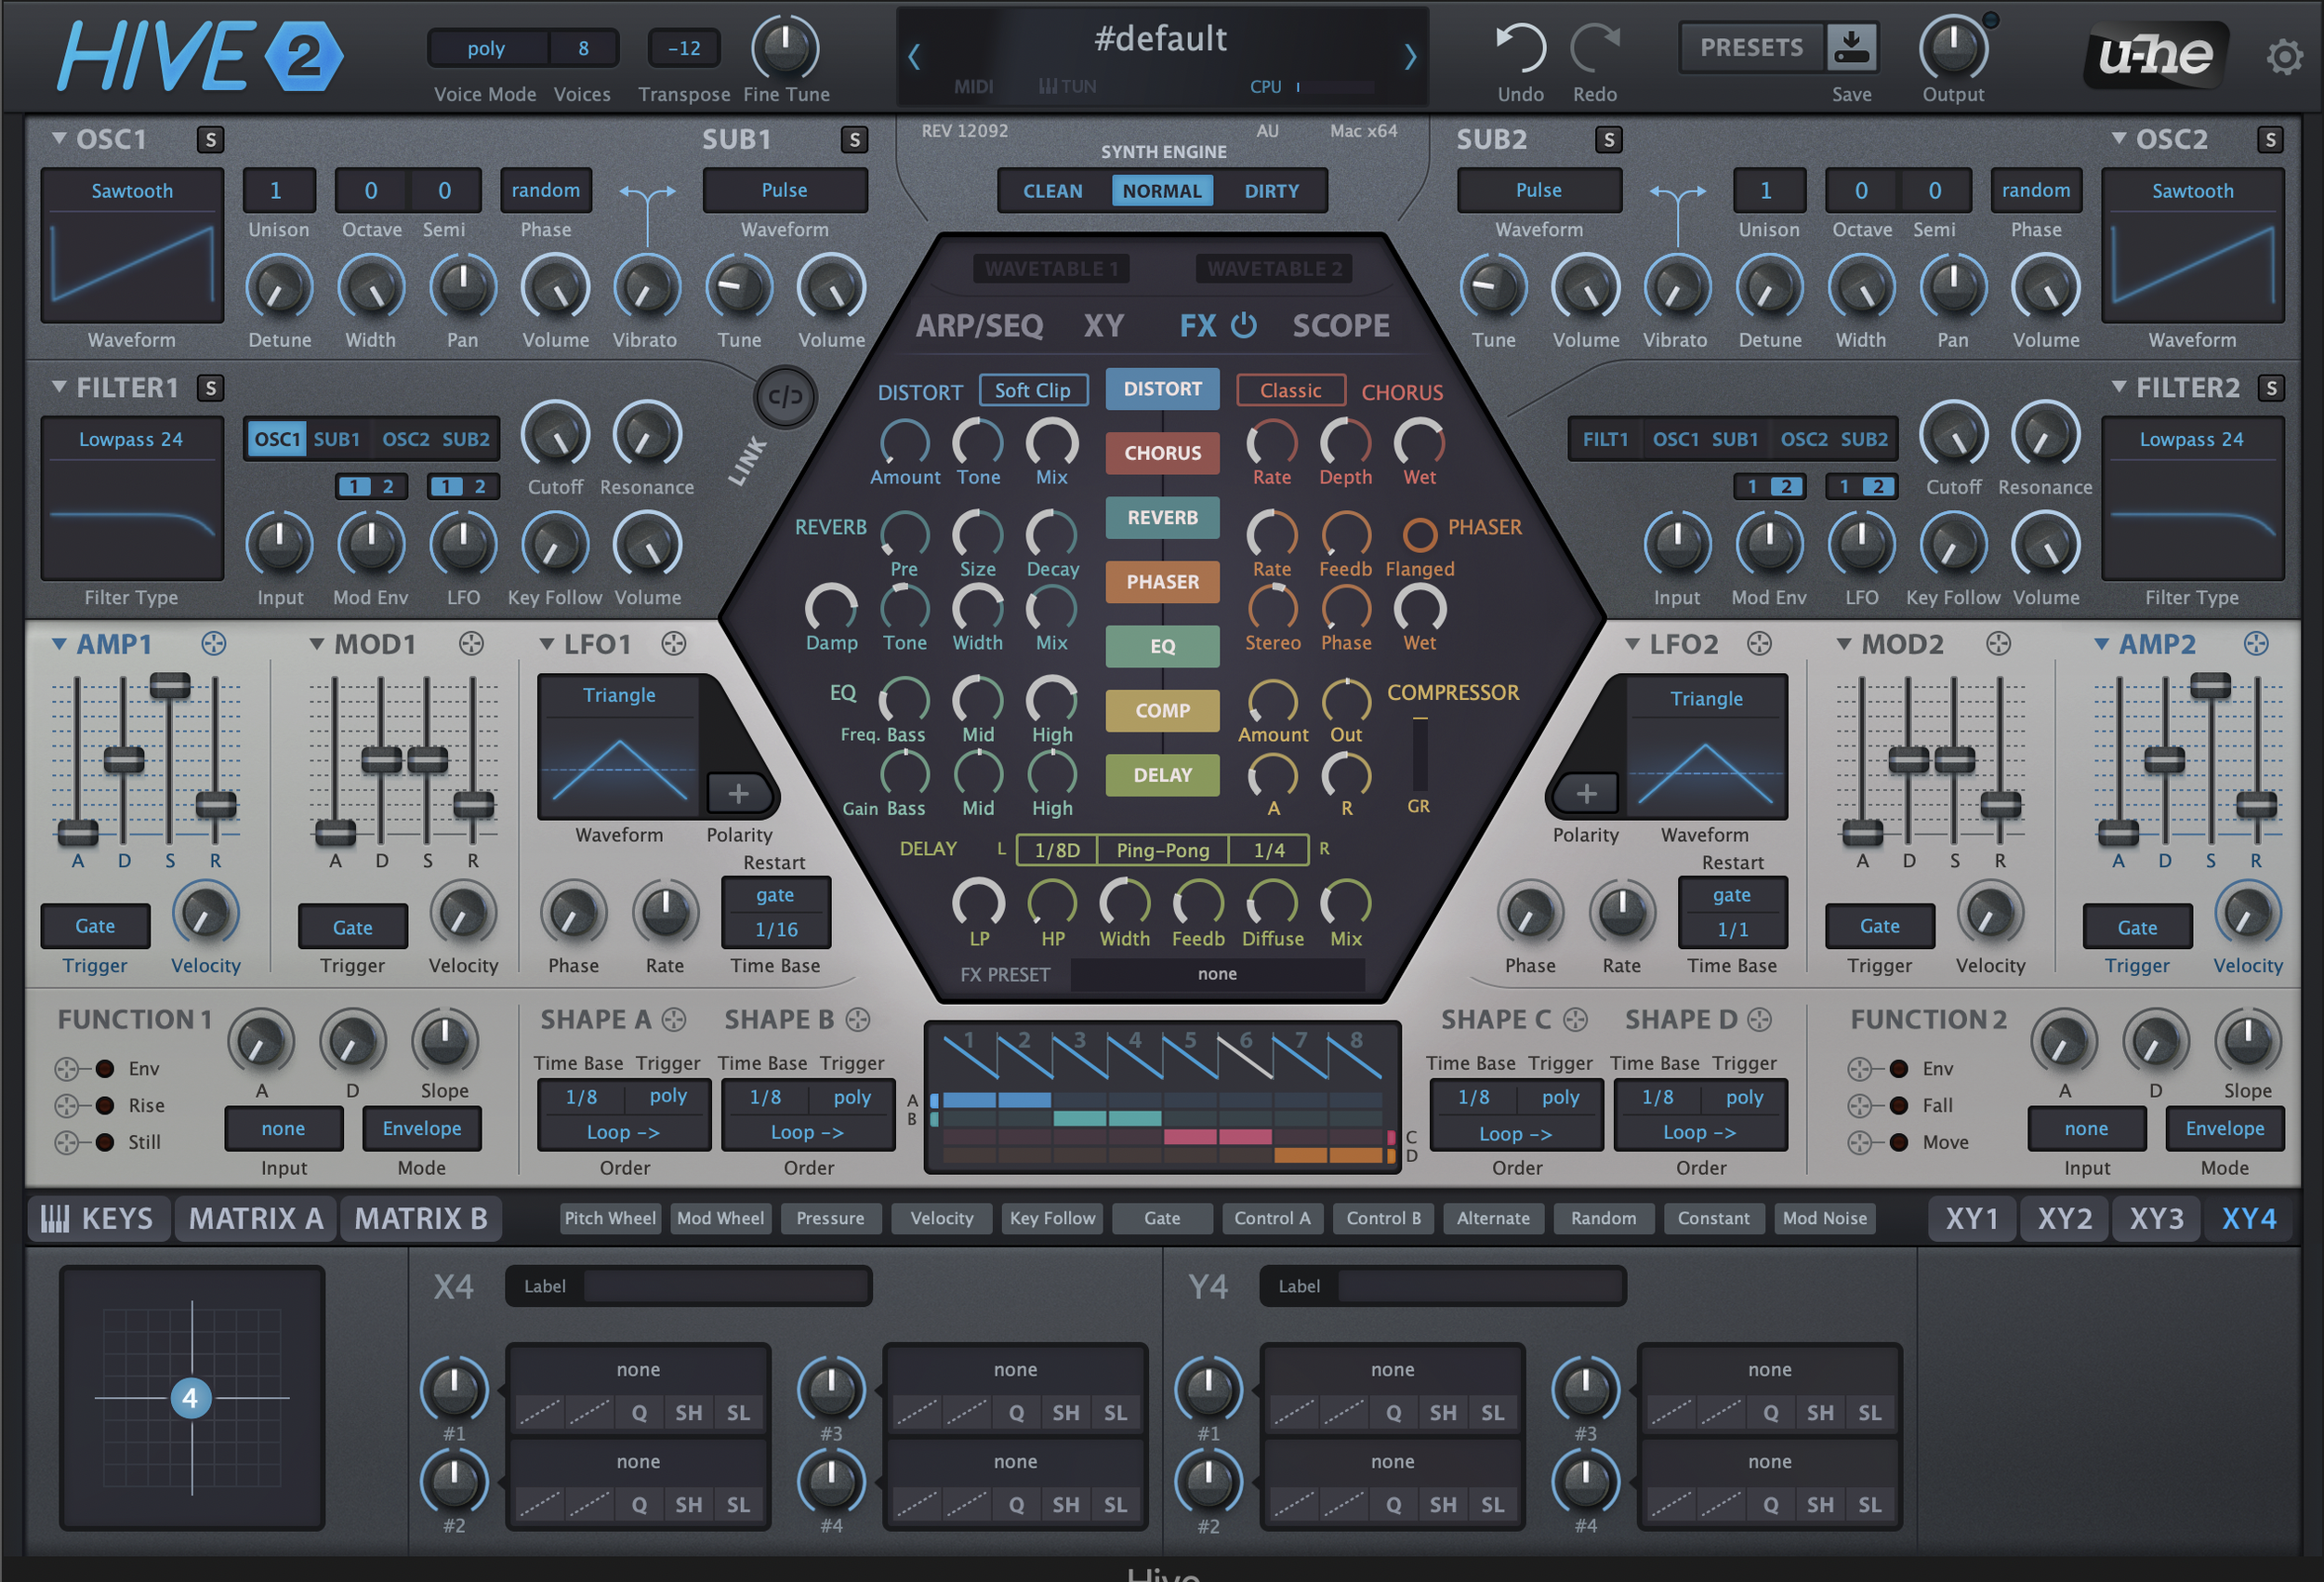
Anatomy of a Synth: Oscillators, Filters, Envelopes, and LFOs
Understanding the building blocks of synthesis is essential for sound design:
- Oscillators: Generate raw waveforms (saw, square, sine, etc.)
- Filters: Shape the tone by removing frequencies (low-pass, high-pass, band-pass)
- Envelopes (ADSR): Control how a sound evolves over time (Attack, Decay, Sustain, Release)
- LFOs (Low-Frequency Oscillators): Modulate parameters for movement and interest
By mastering these components, you can transform any preset or create entirely new sounds from scratch.
Step-by-Step: Tweaking Presets to Make Them Your Own
- Choose a Preset: Start with a sound that’s close to your vision.
- Adjust Oscillators: Change waveforms, detune, or blend multiple oscillators.
- Modify Filters: Experiment with cutoff frequency and resonance to alter the timbre.
- Shape the Envelope: Tweak attack, decay, sustain, and release for dynamic control.
- Add Modulation: Use LFOs or envelopes to animate filter, pitch, or amplitude.
- Apply Effects: Enhance with reverb, delay, chorus, or distortion.
- Save Your Patch: Name and save your custom sound for future use.
Deep Dive: Creating Sounds from Scratch
Creating a patch from scratch is the ultimate way to develop your signature sound. Here’s a basic workflow:
- Start with an Init Patch: Most synths offer a blank slate.
- Select Oscillator Shapes: Choose waveforms that match your desired tone.
- Layer Oscillators: Combine different waves for richness.
- Filter and Shape: Use filters and envelopes to sculpt the sound.
- Modulate: Assign LFOs or envelopes to pitch, filter, or effects for movement.
- Refine with Effects: Add spatial and time-based effects to polish your sound.
Advanced Techniques: Modulation, Automation, and Effects
- Modulation Matrix: Route multiple sources (LFOs, envelopes) to various parameters for evolving sounds.
- Macro Controls: Assign multiple parameters to a single knob for expressive performance.
- Automation: Draw parameter changes in your DAW for dynamic soundscapes.
- Creative Effects: Use plugins like Valhalla SuperMassive for lush reverbs or Glitchmachines for experimental textures2.
Free vs. Paid Synth Plugins: What’s Right for You?
| Aspect | Free Plugins | Paid Plugins |
|---|---|---|
| Cost | $0 | Varies ($50–$300+) |
| Features | Often robust, sometimes limited | Full features, premium presets |
| Support | Community-driven | Official support, updates |
| Sound Quality | High (in many cases) | Consistently high, unique engines |
Free synth plugins like Surge XT, Vital, and Tyrell N6 offer professional results, especially for those starting out or on a budget1. Paid plugins may provide more advanced features, unique synthesis engines, and exclusive presets.
Top Free Synth Plugins for Personalization
- Surge XT: Versatile, open-source, and feature-rich.
- Vital: Wavetable synth with a sleek interface and deep modulation.
- Tyrell N6: Analog-style sounds, great for classic tones.
- Dexed: Faithful Yamaha DX7 emulation for FM synthesis.
- TAL-Noisemaker: Simple subtractive synth with a warm sound.
You can find detailed comparisons and download links in many music production blogs and YouTube channels1.
Integrating Synth Plugins into Your Workflow
- MIDI Mapping: Assign plugin parameters to your MIDI controller for hands-on control.
- Layering: Combine multiple synths for complex textures.
- Template Projects: Save your favorite plugin setups for quick access.
- Resampling: Record and manipulate synth sounds as audio for further processing.
Crafting a Signature Sound: Tips from the Pros
- Analyze Your Influences: Break down the sounds in your favorite tracks.
- Experiment Relentlessly: Try unconventional settings and combinations.
- Document Your Process: Save versions of your patches and take notes.
- Trust Your Ears: Your taste is your best guide—let it lead your decisions.
- Stay Inspired: Follow YouTube channels and forums for fresh ideas and tutorials.
Common Pitfalls and How to Avoid Them
- Preset Paralysis: Don’t get stuck browsing presets—start tweaking!
- Overprocessing: Too many effects can muddy your sound; use them strategically.
- Ignoring Gain Staging: Keep levels in check to avoid distortion.
- Neglecting Context: Test your sounds in the mix, not just solo.
Useful YouTube Tutorials for Synth Sound Design
Final Thoughts: Your Journey to Sonic Identity
Moving from presets to personalized sounds is a transformative journey for any music producer. By understanding the fundamentals of synthesis, exploring free and paid plugin options, and continually experimenting, you’ll develop a unique sonic fingerprint that sets you apart. Remember, the tools are only as powerful as your creativity—so dive in, tweak, and let your signature sound emerge.
“The beauty of synthesis is that there are no rules—only possibilities.”